Monday, October 11, 2010

Apples, Apples, Apples!


Fall is my favorite season. My reasons include: my birthday is during the fall, I love halloween, I love wearing cozy scarfs and gloves, apple cider is one of the best beverages in the world, pumpkin patches are fun for people of all ages, and apples are plentiful.

 
There is a lovely produce stand in Newberg that I have been shopping at since I was a freshman in college. It is always a sad day for me when they close up for the winter (and a wonderful day when they re-open).


This fall I have done a lot of shopping at Ray's Produce, but what i have bought more than anything so far is apples. Fuji, gala, golden delicious, pink lady, jonathan, honeycrisp...apples, apples apples!


First I dehydrated some apples. I sprinkled a little cinnamon sugar over apple rings and slices and cooked them for hours in my new food dehydrator (that I scored at a garage sale for $5!).


Secondly, I did something I have always wanted to do: I made applesauce! It ended up being so easy that I wondered why I hadn't made any sooner!


I decided not to can any of it and instead made a relatively small batch and froze some. (While making this I can across the suggestion to try some warm homemade applesauce with a dollop of vanilla ice cream on top...oh my! was it good!)


With the majority of the applesauce I made apple butter. If you have not had apple butter you need to try some very soon! It resembles jam and tastes like fall! Contrary to the name, there is no butter in apple butter at all. It is just a cooked and reduced mixture of applesauce, spices and sugar.


I hope this post has inspired you to go out and buy or pick some apples and make something wonderful out of them!

Applesauce
Adapted from Simply Recipes

  • 7 to 8 lbs of peeled, cored, and quartered apples. (Make sure you use a good sweet cooking apple like Golden Delicious, Granny Smith, Fuji, Jonathan, Mcintosh, or Gravenstein.)
  • 8 strips of lemon peel - use a vegetable peeler
  • Juice of two lemons, about 6 Tbsp
  • 2 cinnamon sticks
  • 1/2 cup of dark brown sugar
  • up to 1/2 cup of white sugar (depending on sweetness of apples)
  • 2 cups of water
  • 1 teaspoon of salt
Put all ingredients into a large pot. Cover. Bring to boil. Lower heat and simmer for 20-30 minutes.

Remove from heat. Remove cinnamon sticks and lemon peels. Mash with potato masher.

Ready to serve, either hot or refrigerated. Delicious with vanilla ice cream or vanilla yogurt.
Freezes easily, lasts up to one year in a cold freezer.


Apple Butter
  • 6 cups applesauce 
  • 2 cups sugar
  • 1/2 tsp allspice
  • 1/2 teaspoon ground cloves
  • 1 1/2 teaspoon ground cinnamon
Put all ingredients in slow cooker and cook on low for 8-14 hours. Freezes very well.

* Here is a site with some good information about apple butter

Leavenworth Oktoberfest


For my 22nd birthday my generous parents took me to the Oktoberfest in Leavenworth WA. I had been hinting around the fact that I wanted to go this year for a while but I think they made the final decision while I was in Austria and Germany in May. 


If you have never been to Leavenworth, you must go! It is a small Bavarian themed town with plenty things to do, eat, drink and see. I've been to Bavaria (a state in Germany) and I can honestly say that Leavenworth does remind me a lot of it. Even the beautiful mountains behind Leavenworth are reminiscent of the Alps. 

Before we left for Leavenworth I packed the latest copy of Northwest Palate in my bag because they had just done a feature on Leavenworth and all the great destinations and restaurants one has to visit. 


Our first meal was at the very popular Munchen Haus Bavarian Grill and Beer Garden. Despite the usually long line, this place is a must on your dining schedule. The outdoor Beer Garden is a loud place full of German charm and they serve up a mean bratwurst. 


The sausages are prepared right in front of you and once you get your sausage you then have to make the very difficult decision of which mustard you are going to use (they have over 20 options!). After much thought I settled on garlic Dijon and honey and champagne mustard. They also have fabulous homemade apple cider sauerkraut which I personally think is a  condiment no sausage should go without. 

The Oktoberfest itself was actually a letdown. I expected a much better selection of German foods, but what I found was a disgrace to Germany itself. There were about ten different food booths inside the festival but they all had the same drab menu: bratwurst, polish dog, hot dog and some sort of pulled pork dog. That was it! 

One only had to be in the festival a few minutes to realize it really was all about the beer. Now don't get me wrong, I have nothing against beer, especially German beer, but I didn't go all the way to Leavenworth for beer. I was there for the food!

Take my suggestion, if you are going to Leavenworth for the Oktoberfest don't eat all your meals in the tents. Venture out into the charming town and discover all the wonderful foods Leavenworth has to offer. 

 Guava and raspberry gelato at Via Dolce Gelato

With that said I still did enjoy the Oktoberfest, and if anyone reading this wants to go it is still going on next Friday and Saturday October 15th and 16th. 

Here is a list of other great places to eat in Leavenworth: 

Thursday, September 23, 2010

Blueberry Lavender Freezer Jam


I absolutely adore blueberries. They are my favorite berry and lucky for me they are one of the healthiest foods there is. As with many other fruits, I went blueberry picking this summer. In total we picked about 20 pounds of blueberries and bought another fifteen.


(Random fact: while picking blueberries I picked a kitten as well. I had been wanting a kitten and there they were running around the blueberry patch! The owner said I could have one, so now I have more than just frozen blueberries from that trip, I also have Berry the cat!) 


In order to preserve some of the delicious blueberries I decided to make blueberry jam. But not just any blueberry jam, lavender blueberry jam (are you sick of my lavender posts yet?).


As with my lavender lemon bars I used lavender sugar to give this jam the faintest fragrance of lavender. At first I couldn't taste it, but as I swallowed it lingered on your tongue. I think it is an absolutely marvelous combination! 


I decided to make this a freezer jam so I didn't have to fuss with making real jam. But this combination can easily be made into canned jam (just make sure you follow a different blueberry jam recipe for the traditional canning process).

Since I am posting this quite a few weeks (ok, maybe months!) after I picked blueberries and made this jam, I would like to point out that this jam can be made just as deliciously with frozen blueberries. Just thaw them out and you're good to go!


Blueberry Lavender Freezer Jam
Adapted from the recipe inside Sure-Jell Pectin box
  • 3 cups crushed blueberries
  • 5 1/4 cups lavender sugar (recipe follows)
  • 1 box pectin
  • 3/4 cup water
  1. Wash and rinse plastic containers with tight fitting lids. Use 1 to 2 cup size containers. 
  2. Prepare blueberries by discarding stems and crushing (or blending in a food processor). 
  3. Measure 3 cups crushed blueberries in a bowl and add 5 1/4 cups lavender sugar. Let stand 10 minutes, stirring occasionally. 
  4. Stir 1 box pectin and 3/4 cup water in small saucepan. Bring to boil on high heat, sitting constantly. Boil 1 minute, stirring constantly. Remove from heat. 
  5. Stir pectin mixture into fruit or juice mixture. Stir constantly until sugar is completely dissolved and no longer grainy, about 3 minutes. 
  6. Pour into prepared containers, leaving 1/2 inch space at the top for expansion during freezing, cover. 
  7. Let stand at room temperature 24 hours until set. Refrigerate up to 3 weeks. Otherwise, store in freezer for up to 1 year. Thaw in refrigerator.


Lavender Sugar
  •  1 cup sugar
  • 2 Tbsp dried lavender flowers.
Combine sugar and 2 tbsp dried lavender in an airtight container and let sit for at least two days, preferably more. Sift out lavender before using. Multiple this recipe as many times as necessary. 

Monday, September 13, 2010

I'm a Published Food Writer!


"With its motto 'Great Coffee is Public Domain,' this new coffeehouse in downtown Portland has set out to provide superior cups of coffee--not just something to drink every morning to wake up with, but rather a truly buzz-worthy experience."

This is an excerpt from my restaurant review of Public Domain coffeehouse that was published in the September/October issue of Northwest Palate.

Northwest Palate is a local magazine covering everything food, wine and travel-related in the Pacific Northwest. It is a great magazine and I had the wonderful opportunity to be their editorial intern this summer.

Never in my wildest dreams did I imagine that being an editorial intern would lead to my first real food-writing publication, but it did! 

You can find a copy of Northwest Palate at these locations. Pick one up this month or next and read my entire review of Public Domain.

Saturday, September 4, 2010

Spicy Dill Pickles


My mother and I embarked on quite the adventure this summer. We made pickles. From scratch (well, from cucumbers)! It is something I have always wanted to do and have been talking about all summer, so we finally got up the guts to just go ahead and do it.

 
We devoted an entire day to Pickle Production. We woke up and purchased gherkin cucumbers and huge bunch of dill almost as tall as me from a local produce stand. We then went to the grocery store in search of all the supplies pickles require. We had to find pickling salt, a huge jug vinegar, and pickling spices.


We didn't have to worry about finding jars, rings, or lids because my parents had bought a couple boxes of wide mouth canning jars at a garage sale this summer! Score!

My mom did a lot of research online to find a dill pickle recipe that reminded her of the ones she would help her grandma make when she was young. She fondly recalls sneaking more peppers in the pickles jars before they were sealed--she loves a good spicy pickle!


Although my mom found a good recipe, we tweaked it a bit. We added a lot of garlic, more spices, and a lot of peppers. We also threw in some onions too, because when is a little onion a bad thing?


We got started by washing all the jars and then sterilizing them in a hot water bath. After they were sterilized we began eagerly filling them with the cucumbers and the spices. It felt just like we were packing a goodie bag or a gift basket! We knew when these jars were opened next they would be enjoyed by our eager mouths or by our lucky friends and family.


At this same time we were cooking the brine solution of water, vinegar, and pickling salt ( I looked at the ingredient list of pickling salt to see how it differs from any other salt, and it just said SALT! I went to several stores to find regular salt?!?). The whole house began smelling like pickles before we even poured the brine over the cucumbers. I am convinced I smelled like pickles for days too, although no one would admit it.


We then poured the brine into our fill jars and put on the lids. Next was the time consuming part. We had to boil each of the jars for fifteen minutes. We're lucky we had two canning pots but it still took about an hour to get all the jars processed.


Then came the very rewarding part (well, other than eating them)...we got to hear all the jars "pop!" as the lids sealed. This was proof that we had successfully canned pickles! They would stay perfectly fresh for up to year. Canning really is an amazing thing!


Now this particular recipe calls for the pickles to cure for eight weeks. This means eight whole weeks of torture and eating sub-par pickles from the grocery store. This was not going to fly with us so what did we do? We opened one jar not even 24 hours after making them. And believe it or not, it was REALLY GOOD! It looked like a pickle, smelled like a pickle and tasted like a pickle!


Of course I have opened several other jars since then (ya, it's still only been a few weeks) and they have only gotten better! The most recent jar was very flavorful and had a good amount of heat. I just served them two nights ago at my apartment warming party and am pleased to report that they were the first food to disappear. I would say our first pickling experience was a success and I definitely plan on doing it again next year!


Spicy Dill Pickles

25 lbs of Gherkins cucumbers
32 cups of water
2 cups pickling salt
12 cups white vinegar
Garlic, cut in half
Fresh Dill Weed
12 dried hot red peppers
Pickling spice
Peppercorns
Onion, sliced

Sterilize the jars and lids in a boiling water for 10-15 minutes. At this time have your cucumbers soaking in an ice bath to keep them crunchy.

Prep your pickles. If you want your pickles sliced, do so now, or leave them whole.

Make the Brine. Bring water, salt and vinegar to a rolling boil in a large pot.

Meanwhile, fill each jar. Put a layer of spices on the bottom: 2 cloves of garlic, 2 peppers, a few slices of onion, a sprig of dill, 1 teaspoon of pickling salt and 1/2 teaspoon peppercorns. Now, pack the jars with as many pickles as possible. Next put another layer of spices and flavoring agents on the top.

Fill each jar with brine, leaving a little room at the top.

Wipe off the top of each jar. Place a lid on each jar (these have just come out of the hot water) and seal with a ring.

Finally, process the jars in a boiling water bath from 15 minutes.

Pickles will be ready in 6 weeks if sliced and 8 weeks if whole. However, they are still delicious if opened sooner. Enjoy!

Friday, August 20, 2010

Kraut Kuggas: German Cabbage Rolls


Last week I was craving a food from my childhood. But don't be fooled this is not your typical kids' fare. This food has been central in my family for generations. This meal was not just food of my childhood, but was food of my mother's childhood, my grandmother's childhood and even further back than that.


My mother is almost 100% German and grew up with a very traditional German grandma. She didn't drive, she never had a job, and she cooked everything from scratch...and I mean everything! Her homemade breads, pastas and desserts were so delicious that I still hear about them from my mother to this day.


One of her most popular meals was her famous Kraut Kuggas. Now, I don't expect you to know what these are because, in truth, I googled it and found no references on the internet! I grew up my whole life thinking Kraut Kuggas were a traditional German food that every German woman knew how to prepare for her family... I even looked for them while I was traveling in Germany!


Nonetheless, this is a traditional German food in my family, and that is good enough for me (plus they are delicious!)


Kraut Kuggas are white rolls that have been stuffed with ground beef, cooked cabbage, and onions prior to baking. From the outside they look like a large roll but when you cut them open they are full of hot meat filling! If you are short on time--or don't enjoy the wonder that is homemade bread--you can use a frozen dough for these. Enjoy!


Kraut Kuggas
Recipe of my Great Aunt Dorothy Markell
(Thanks to Leann Hollett for getting it to me!)

1 batch of white bread dough (I use the white bread from Joy of Cooking)
1 medium head cabbage
2 medium onion
1 1/2 lbs hamburger
Salt
Pepper
Vegetable Oil

Core head of cabbage, the cut it into half. Slice each half into 1/4 to 1/3 inch slices lengthwise, stack, then cut two or three more slices across so that it is a little bigger than what you would use for coleslaw. Do the same with the onion. Remember, you are putting this into something the size of a dinner roll.

Sweat the onion and the cabbage in a large pot on medium till it is soft but not mushy. DO NOT ADD OIL OR SEASONING TO THIS PROCESS!! This makes it watery.

Once the vegetables are cooked, set aside and cool to room temperature.

Fry hamburger in a frying pan to the consistency of taco meat. Do not add oil or seasonings to this process either. Set aside and cool to room temperature.

Once meat and veggies are cool to room temperature, add the meat to the veggies. Add 1 Tbs Pepper and 1 Tbs salt, then keep adding to taste. (1-2 Tbs each). A lot of pepper is a good thing. Stir ingredients together.

Ball dough to the size of a golf ball and pat out onto a smooth, clean and un-floured surface to approximately the size of a saucer. Make sure your hands are clean and dry during this process. Do not flour your hands. keep a paper towel handy to wipe your hands on. Once the dough is saucer sized, cup the flattened dough in the palm of one hand while with the other hand, use a soup spoon, scoop the mixture from the pot into the center of the dough circle in your hand. Carefully pinch each side together until it is all closed. You can smooth out the pinches a little with your finger.

Using a 1 inch deep large baking sheet, put 2-3 tablespoons of oil in the center. Coat each side of the Kraut Kuggas in the oil and place evenly onto the pan allowing 1-2 inches space between each Kraut Kugga. Add more oil if needed. Let rise 30 minutes.

Bake the risen Kraut Kuggas for 30 minutes at 400 degrees. When done they should be golden brown.

Wednesday, August 18, 2010

Lavender Lemon Bars


As you may already know from my previous Lavender Festival post, I am enamored with culinary lavender. This fixation started a few months back and has been since consuming my thoughts and my cooking.


I  even convinced the owner of the cupcake bakery where I work to put a lavender cupcake on the menu this month. It is called purple passion (which is a good title my lavender obsession) and is VERY lavender-y. Yum!


After falling in love with lavender lemonade I decided to experiment with what I thought would be the perfect cookie bar: a lavender lemon bar.


The lemon bar recipe I used is one of my all-time favorite recipes so I knew it would be a delicious cookie to add lavender to. I refused to use the ever-helpful tool that is google to see if there is a recipe for these bars and instead did it the old fashioned way: trail and error.


And, let me tell you, at first, there was error. But in the end I think I created a heavenly lemon bar with a hint of fragrant, floral, and absolutely wonderful lavender.


I hope you enjoy this simple and delicious recipe!


Lavender Lemon Bars

1 1/2 cups plus 3 tablespoons all-purpose flour
1/2 cup plus 1 tablespoon confectioners' sugar
3/4 cup cold butter (1 1/2 sticks), cut into small pieces
2 large lemons
3 large eggs
1 cup granulated sugar
2 Tbsp dried lavender flowers plus more for garnish 
1/2 teaspoon baking powder
1/2 teaspoon salt

Make lavender sugar: Combine sugar and 2 tbsp dried lavender in an airtight container and let sit for at least two days, preferably more.

Preheat oven to 350 degrees F. Line 13" by 9" metal or glass baking pan wit foil, extending it over the short ends. Lightly grease foil.

In medium bowl, combine 1 1/2 cups flour and 1/2 cup confectioners' sugar. With pastry blender or 2 knives used scissor-fashion, cut in butter until mixture resembles coarse crumbs.

Sprinkle dough evenly into prepared pan. With floured hand, pat dough firmly into bottom. Bake 15 to 17 minutes, until lightly browned.

Meanwhile, from lemons, grate 1 teaspoon and squeeze 1/3 cup juice. In large bowl, with mixer at high speed, beat eggs until thick and lemon-colored,  about 3 minutes. Reduce speed to low; add lemon peel and juice, lavender sugar, baking powder, salt, and remaining 3 tablespoons flour, and beat until blended, scraping bowl occasionally.

Pour lemon filling over warm crust. Bake 15 minutes, or until filing is just set and golden around edges. Transfer pan to wire rack. Sift remaining 1 tablespoon confectioners' sugar over warm filling. Take a small handful of dried lavender flowers and rub them lightly in your hands to release their fragrant oils; sprinkle evenly over bars. Cool completely in pan on wire rack.

When cool transfer foil to cutting board. Cut lengthwise into 3 strips, then cut each strip crosswise into 12 pieces. Makes 36 bars.

Monday, August 9, 2010

Elephant Garlic Festival


I have always had a mild obsession with garlic. This was never more apparent to friends and family as it was my Freshman year of college when I wrote a nineteen page research paper solely on garlic. In my foods class I was asked to pick any fruit or vegetable to write about, and of course I had to pick my favorite: garlic!


About two years ago I was made aware of the Elephant Garlic Festival held in North Plains, Oregon every August. Well, it wasn't until this year that I was able to go, and I'm very glad I did!


It was a nice change to be around people who are as excited about garlic as I am. I even surprised a garlic grower when I knew the botanical name for garlic (for those who care, it's Allium sativum).


The festival wasn't very large (and neither is the town of North Plains), but it was the perfect activity for a few hours. There was crafts fair and some family-friendly activities, but I was really there for the food (when am I not?) so I headed straight to the GARLIC!


Several farmers were selling their varieties of garlic and elephant garlic (which is not really garlic, but is actually in the leek family). I really enjoyed browsing at Garlic Gourmet's booth, they were selling over 50 different types of garlic products!


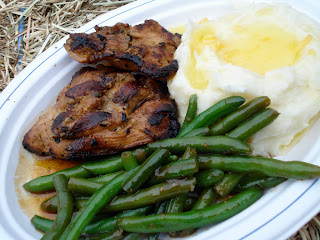
The garlic food options were endless. One could purchase garlic popcorn, garlic bread, garlic mashed potatoes, roasted garlic cloves, garlic ice cream, and even garlic beer! I had some of the best garlic mashed potatoes of my life there and got to try garlic ice cream--which is something I have been wanting to do since I included a garlic ice cream recipe in my nineteen page garlic paper.


Believe it or not, the garlic ice cream was actually pretty good! It was a lot more "garlic-y" than I expected but I did eat the whole bowl, so I would say it was a culinary success. (FYI the garlic ice cream and garlic beer are not sold at any other time of the year, so come to the festival and get your fill!).


Here is a recipe I picked up at the festival for garlic mashed potatoes. I haven't tried this recipe yet, but maybe it's as good as the mashed potatoes I ate there!?
'


Mashed Potatoes with Garlic
Prepare potatoes as usual. Peel, quarter and clean 4-6 cloves elephant garlic. Drop in pot with potatoes and bring to a boil. Turn temperature down to medium and cover for 20 minutes. Test the garlic and make sure it is soft. Whip both the potatoes and garlic together. Add butter, milk, salt and pepper to taste. I add a little (1/2 tsp) of baking powder to my whipped potatoes, it makes them lighter and fluffier. Enjoy!